
Cestrum nocturnum, aka, night blooming jasmine, belongs to the family of Solanaceae. It is also known as the nightshade or potato family of plants, mostly characterised by their intoxicating floral fragrance. Cestrum nocturnum is a sub-tropical vine, first discovered in the West Indies and named after its white or yellow, trumpet like flowers, which bloom at night and fill the air with an incredible scent. Night blooming jasmine grows in a highly invasive fashion once the growing and caring techniques are nailed down. Reason why, it is one of the most common choices for indoors decorative items and also outdoors for backyard, street isles and common urban areas. They can be pretty sensitive and delicate to care for in between seasons, such as, the winter or summer and often times people wonder how to propagate these plants.
How to propagate a night blooming jasmine from seeds.
Whether you have bought some seeds from a supplier or whether you have pollinated your flowers yourself and collected the berries, propagating night blooming jasmine is an easy enough process. It is easy but not simple, as there are some steps to get right for its optimal growth after propagation. Propagating Cestrum nocturnum from seeds is much less effective than doing it from cuttings, as it is much more effort and time consuming, you have to wait for the berries to shrivel up and fall off the plant to then press them up and push the seeds into the bedding soil mix of a pot. Cestrum nocturnum seeds are very small of about 2-3 mm in size and need a temperature of about 75°F for them to germinate. In order for those seeds to surface sown germinate, we need to first prepare the proper optimal soil or planting bedding mix in which the seeds will be transplanted in.
Steps to propagate Cestrum Nocturnum from seeds.
1- The very first and often neglected step before planting the seeds is to soak them up in warm water. The reason why soaking up the seeds is a good idea is because it supplies the seeds with a boost of water in a way that the seed shell softens up. This is to provide some moisture to the inner content of the seeds, easing the germination process. This soaking process resembles the rainfall conditions that in nature those seeds would be exposed to. The right way to do this is to use a bowl or jar and filling it up with warm (not hot) water and adding a handful of seeds for about 24 hours, away from direct sunlight. Immediately after, plant the seeds in the soil mix that we would have prepared beforehand. If they get too dry after soaking them up, they won’t germinate at all. Amongst the benefits of soaking up the seeds are the decrease in the time it takes for those seeds to germinate and break up the shells, as during the soaking process, the defence mechanism of the seeds are broken down, which speeds up the germination process, as moisture sends a cellular signal for growth in safe conditions.
2- Cestrum nocturnum grows optimally in well drained, coarse sandy and rich soil. Usually, composted cow manure mixed with peat moss is the preferred and most commonly used source of nutrients to get the seeds in the germination state and providing a pH of about 7.
3- With the mixture prepared above, fill up a pot of about 4 inches and water the pot mix very well until the excess of water comes out of the drainage hole at the bottom of the pot. Then sow about three of the seeds, you do this afterwards not to dislodge them. Then add a fine layer of the soil mix, press gently with your hands to cover the seeds and make them be in contact with the soil.
4- After the pots are ready, move them to a location where the pot is going to receive full sunlight. If reaching the optimal temperature of 75 F is a problem you can use a heating fan contribute with an extra warmth for the soil.
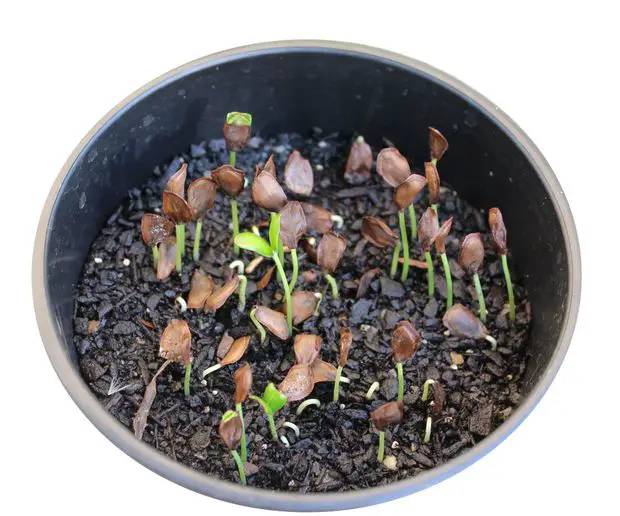
5- It is super crucial to keep the soil moist by spraying water with a water bottle spray daily, but not too much to avoid getting the soil extra wet. Once the seeds start developing with two leaves set, clip and cut the weaker stems at the soil level (do not pull) to keep the roots intact.
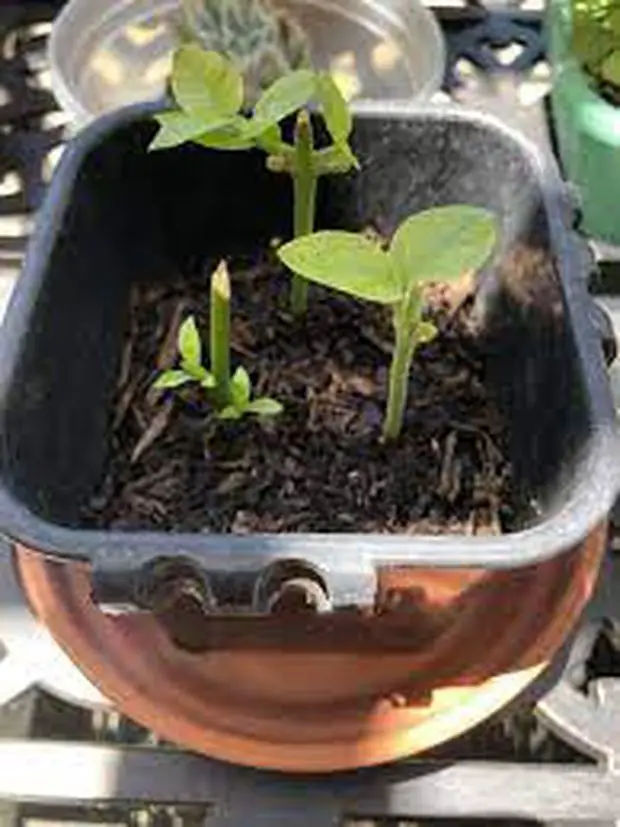
6- Transplant the healthy seedlings of about 6 inches tall, to a bigger pot of about 7-10 inches and take it outdoors where the pot is going to receive full sunlight for about 4 hours a day and it is going to reach a temperature of at least 70 F. This process is going to take about three months. At this stage, the soil should continue a little bit of leaf mold fungicide and more coarse sand soil to top it up the new pot. Provide your night blooming growing plant with the standard watering regime and enough amount of light for its optimal growth.
Can you grow night-blooming jasmine from cuttings.
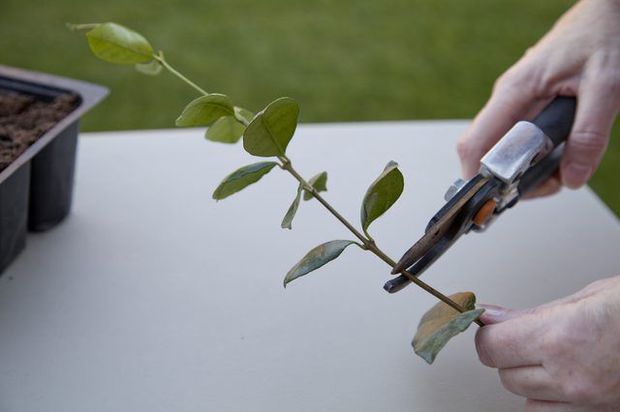
Growing night blooming jasmine from cuttings is really easy but there are some key steps to this technique that we need to get right. It becomes crucial that the tools used to get those cuttings, are fully disinfected (by thoroughly washing them in a solution of bleach diluted with water for about 20 minutes and letting them dry out prior to use). Let the tools air-dry prior to using. Take hardwood jasmine cuttings during the spring dormant season, prior to bud break, by cutting a section of a stem that is 6 to 8 inches in length with a pruning clipper. Make an angle cut, about 3/16 inch above the top bud and a horizontal cut 6 inches below this bud. Dip the bottom stem edge into rooting hormone and gently tap to remove the excess. Keep the cutting in a moist location to prevent the cut edges from drying while preparing the rooting tray. The cuttings we select matters, we should avoid the hard wood ones and take the semi hard woody stems instead, as they will produce stronger roots and flowers much more efficiently than soft branches or harder ones. Then, make some cuts in a 45 angle degree below a stem node of about 6-8 inches long. After getting those cuts, clip all the broad leaves of the stem except for one or two at the top of the cutting to minimise moisture evaporation and thus, preventing from stem to dry out. After that step, we will then grab a cutter and we will scrape off the skin at the bottom of the cutting below the node, in order for that cutting to develop calluses, which will favour the rooting growth as the bare skin of the cuttings will be in contact with hormone rooting solution. Soak up those cuttings in a jar with hormone root powder diluted in water for about 15 minutes and then those cuttings are ready to be planted. After that, prepare the rooting soil bedding, in my case, I prefer using clean sand to begin with, as it has proven to be more efficient in the kick start of the jasmine growth. Prepare that sand by rinsing it with water and fungicides for a couple of times to get rid of pathogens and let it dry out in the sun for about two to three hours. Make sure the sand is still somewhat moist but not wet. Get some small plastic bags, opaque ones, ideally, which you will fill up half way with that prepared sand soil described above. Next, collect all those dark small bags (about 8-10) and put them together in a pot of about 14 inches. Then, grab those cuttings, dip them in hormone rooting powder through the previously scrapped part and plant the cuttings in the sand with a gentle but firm pressure. Then sprinkle some water to help the sand form a uniform layer without drenching it. The next step will comprise making sure that those cuttings are provided with enough constant moisture for those roots to push through and develop, for which covering those pots with a plastic film is a great idea, and place those pots in a warm and light place. After about 20 days you will be blessed with some small but firm roots coming out of those calluses. We have to be realistic and expect about 80% of those cuttings to be successful only. After 10 more days, 30 days post planting in total, the roots are solid and longer and they are ready to be planted out in the optimal soil bedding for night blooming jasmine plant. After 30 days you can planted in small pots or bigger plastic bags, with a soil made of 50% garden soil, 30% compost and 20% and made especially for this type of jasmine and it is important to keep those pots in the shade for an extra week.
Can you root night-blooming jasmine in water.
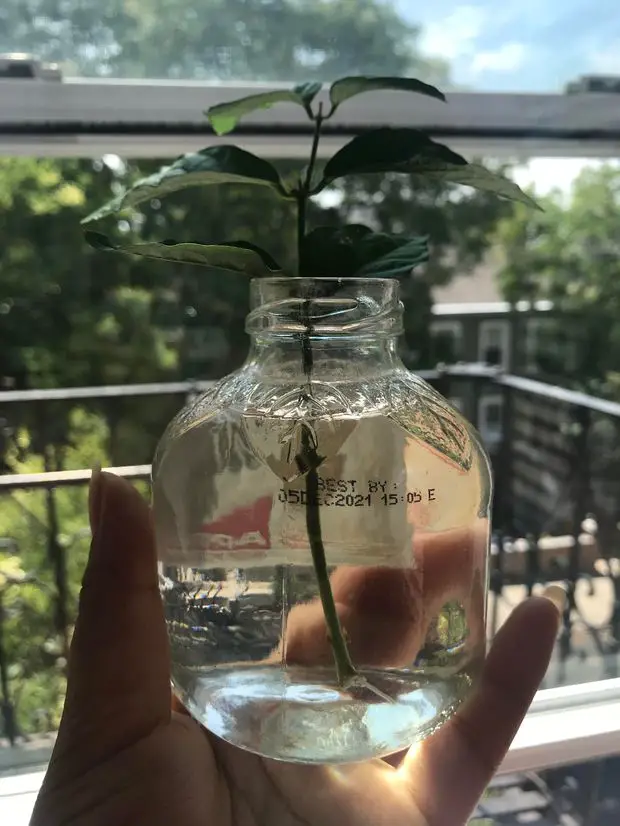
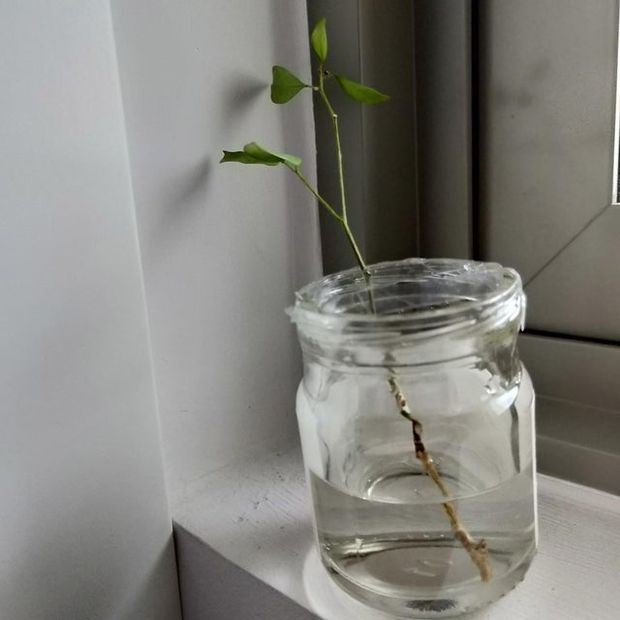
Good question, because indeed you can propagate nigh blooming jasmine cuttings in water. It is a really easy method, however, not very efficient, as it takes a long time of about 3 months and the ratio of successful cuttings versus not is not very high. Eg: 1 every 10 or so. Simply, prepare your cuttings (I would do 10 to 15 cuttings), just as described above, by cutting them in a 45 angle degree and below a node, leaving a couple of leaves at the top for moisture and hydration purposes. Place those cuttings in a tin or jar of about a yogurt size and fill it up with water up until about 2/3 of the cup. Then, place the cup in a light and warm place and change the water every 4 days.
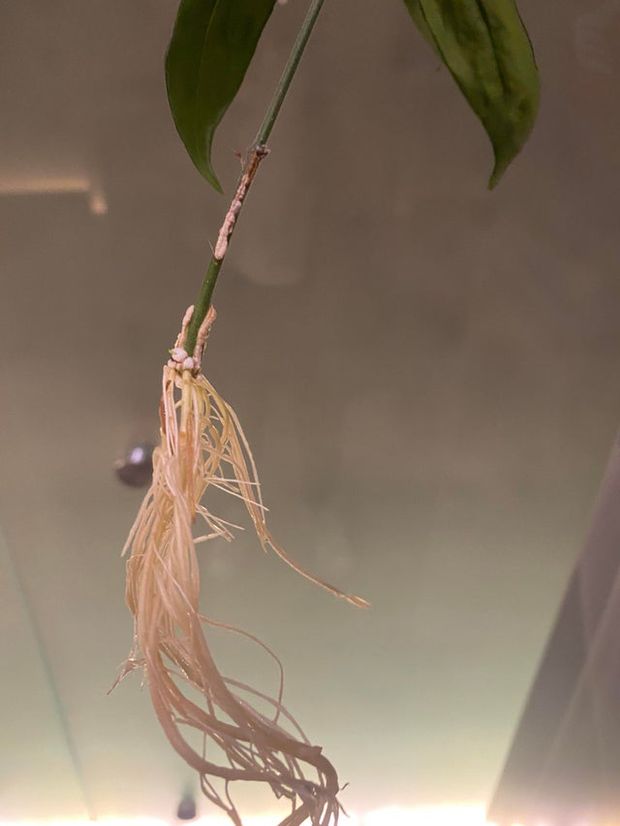
You will need to do this constantly for about 3 months until you get some rooting going on to then plant it into a pot. If you see that some of those cuttings start rooting after about 10 to 15 days, just take those out of the water and plant them in a very small dark bag, as described above, otherwise, if you keep them in water they will start rotting up. Once those cuttings have developed their rooting system, place the cuttings into a small container with standard soil composition for the cutting to further develop before you transplant it to your bigger pot or outdoors desired area.
There you go! apply all these tips to grow some beautiful night blooming jasmine from your desired starting point, whether from seeds or cuttings and prepare to fill in your favourite places with an exquisite plant which scent is so intoxicating!